Sometimes you want the power of a surround system without the distraction of visible speakers. That's where Stealth Acoustics invisible speakers come in. Installed flush with your drywall, they deliver high-performance sound with a clean, décor-friendly finish.
Why Stealth Acoustics?
When you want great sound but don't want to see a wall of black boxes — or speakers that clash with your décor — Stealth Acoustics invisible speakers offer a solution. They're designed to be installed flush with your drywall, not protruding from it. With smooth fronts (not metal grilles with holes), they're truly invisible.
Step 1: Prewire
In this project, the wall was demolished and a new wall constructed. After construction and electrical wiring were completed, speaker wires were run for the three front speakers — left, center, and right — above the TV location.
Stealth Acoustics invisible subwoofers were also chosen, so wires were run for the left and right subs below the TV, along with necessary HDMI and optical cables.
Step 2: Framing
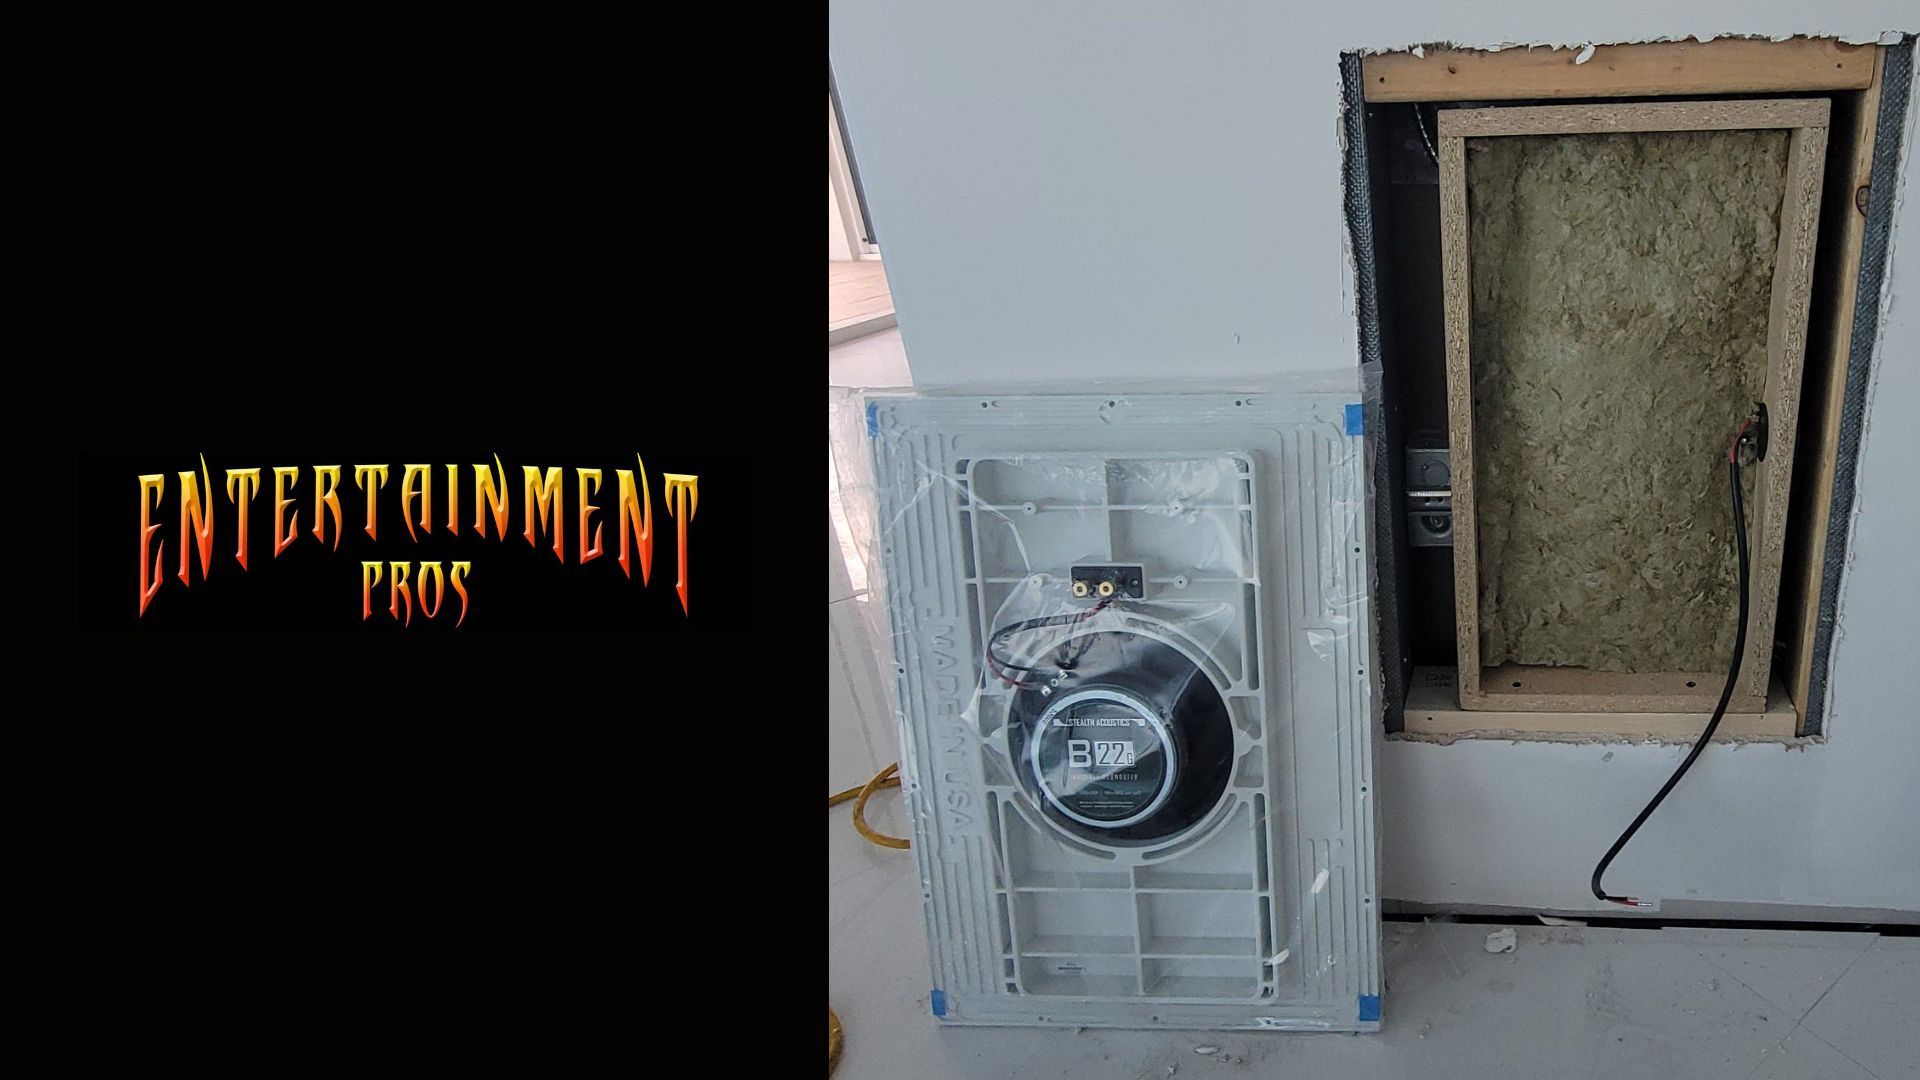
The Stealth Acoustics speakers and subs are designed to fit in a standard 16" on-center stud width, providing approximately 14.5" between studs. Top and bottom framing was added for support on all four sides.
Cardboard templates (from speaker shipping boxes) were installed at speaker locations so drywallers would install up to the speakers without covering them. Templates needed to cover approximately 50% of the stud/framing for proper drywall and speaker securing.
Step 3: Speaker Installation
After drywall installation, the speakers were installed using provided screws at designated locations.
Protrusion is paramount. Speakers ship with cardboard spacers to ensure proper placement — the face of each speaker needs to be flush with the drywall for true invisibility.
While manufacturers instruct spacing speakers 1/16" beyond surrounding drywall, this creates a hump and slight protrusion. The recommended approach is installing the speaker face flush with surrounding drywall.
Since speakers have a slightly recessed perimeter, drywall finishers should lightly score drywall approximately 1.5" around the speaker area, remove the paper covering at that edge, and create a recessed edge matching the speaker's recess. This allows drywall tape and spackle to blend seamlessly for a truly invisible installation.
Important: After speaker installation, connect them to an amplifier to test full sound range before finishing work begins.
Step 4: Finishing and Setup
After drywall taping and finishing, painting or wallpapering is completed. The team then returns to:
- Install the A/V receiver and calibrate the speakers
- Install and adjust the subwoofer amplifier
- Install the TV
- Configure and program required control systems
The final result: a completed project delivering the best of both worlds — a true surround sound system with zero speaker wall clutter.
Want an Invisible Surround System?
For free quotes and onsite consultations, contact Entertainment Pros at 727-804-2277 or tell us about your project.